What’s an Impresa Tile Shower?

Impresa Tile Shower
The forming of a tile shower base on-site is not a quick nor easy task, often beyond a tiler’s skills and experience. Added to the risk of a poorly-formed base, is the high-possibility of the waterproofing failing over a period of time.
The same risk is inherent with pre-formed foam bases as the type shown below.
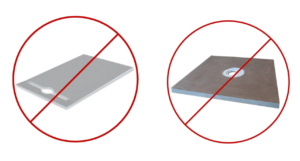
However, Impresa tileable, aluminium trays are designed and maunufactured to create a one-piece watertight tray with high sides and easy-access. Each tray is integrated with glazing channeling and a 10mm-thick frameless-glass enclosure.
For homeowners wanting a lower-budget, watertight tile shower, consider a NEXUS or URBIS shower — market price-leading DIY showers.
For customers desiring a shower in standard or custom sizes with premium choices of hardware, in polished or brushed finishes or on-trend colours, STILE and METRO are the ultimate solutions.
What’s an Impresa Stainless-Steel Shower?

Impresa Stainless Steel Shower
STILE Stainless and METRO Stainless ‘premium’ shower trays are manufactured from 1.5mm-thick stainless steel sheet, fibreglass reinforced, offering a hard-wearing / easy-maintenance shower for a lifetime.
Impresa Premium stainless showers, STILE Stainless and METRO stainless offer customers standard and custom sizes with premium choices of coloured, polished or brushed finished hardware – all included in the competitive pricing.
For homeowners working to a tighter budget, but still desiring a guaranteed watertight, stainless steel shower base and glass enclosure, consider NEXUS Stainless or URBIS Stainless Showers — market price-leading DIY showers.

Tile Shower Installation Overview
Below is a brief overview of the installation process for an Impresa tile shower tray, wall glazing channels, and glass enclosure.
To view and / or print complete Installation Instructions, click the Installation download button on each shower page. Also note, each shower is supplied with Installation Instructions.

Step One
The easy-clean waste can be connected to the waste water plumbing before the tray is installed or after if there sufficient access under the floor.

Step Two
Adhesive applied to the shower tray and also the shower floor area. Shower tray placed into position.

Step Three
If required, a Quik Niche can be installed into framing. The water-resistant wallboard is installed to the shower wall framing.

Step Four
A ‘Liquid-applied’ waterproofing membrane is applied to the shower water-resistant wallboard linings.

Step Five
Glass enclosure wall glazing channels are to be adhered to the cured, waterproof membrane walls BEFORE the application of tile.

Step Six
Tile can now be applied to the shower tray and walls.
At the completion of the tiling, the shower plumbing fittings are to be installed, and lastly, the frameless-glass enclosure is to be installed.
Installation Downloads
Please click on the below links to download a PDF file
Tile Showers
Quick NICHE